


Tạo Virtual Machine Azure
Các bước tạo Windows Server Virtual Machine trên Azure
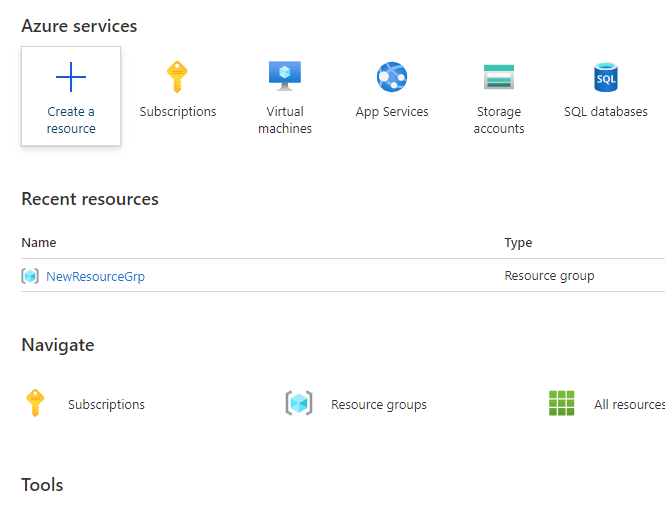
Đăng nhập Azure Portal và chọn Services trong Azure Portal
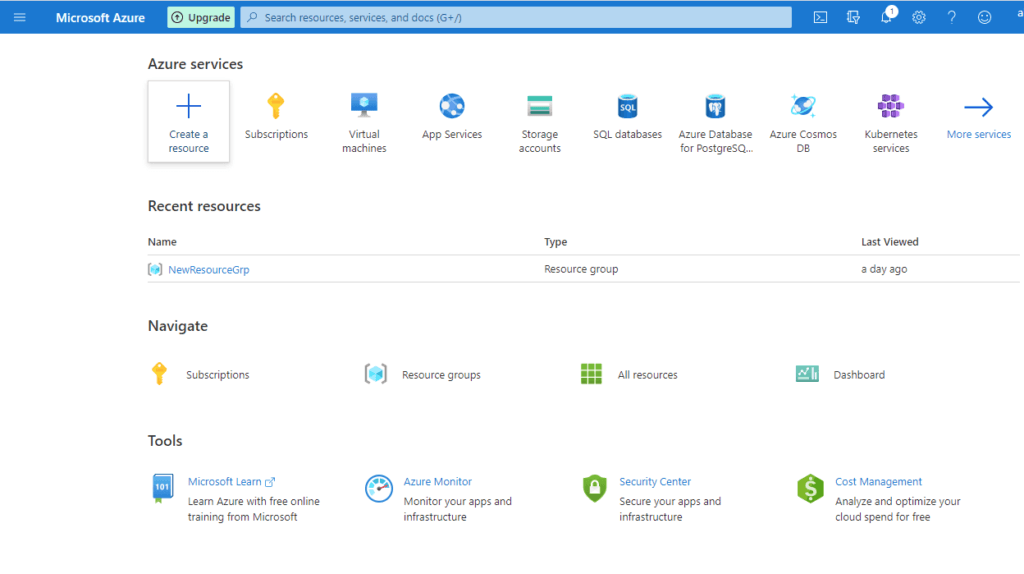
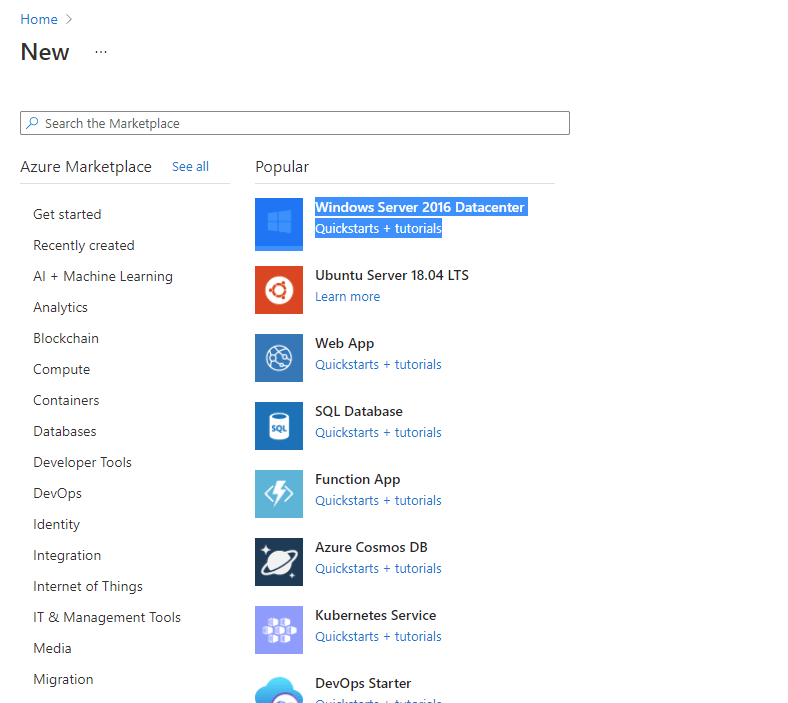
Từ Azure Portal Dashboard, Click chọn Create a Resource
Ở đây chọn Windows Server 2016
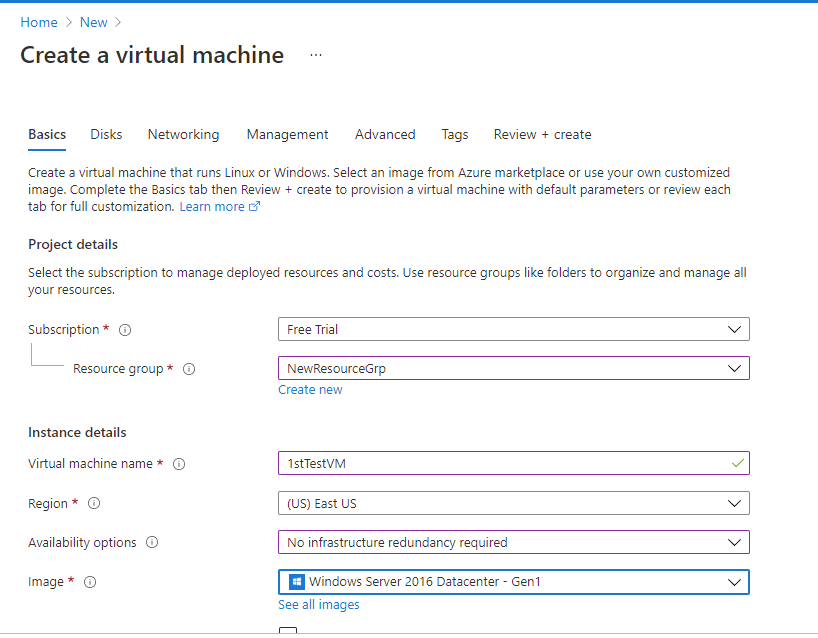
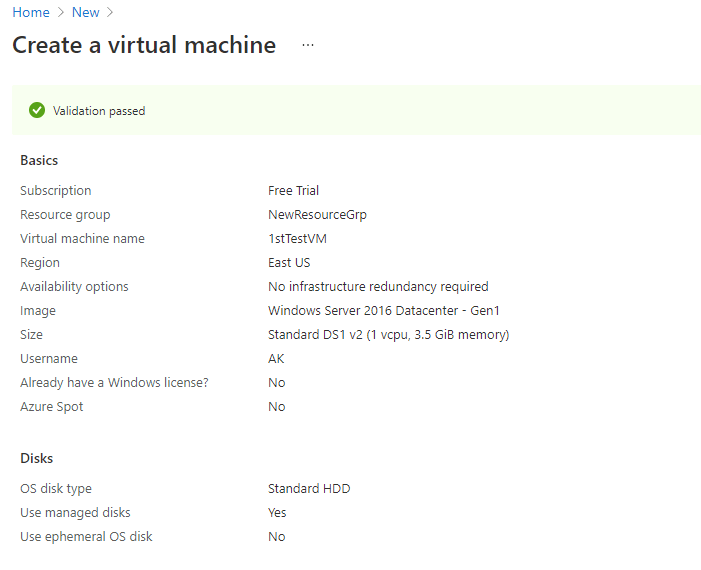
Step #1: Basics– Chọn subscription.
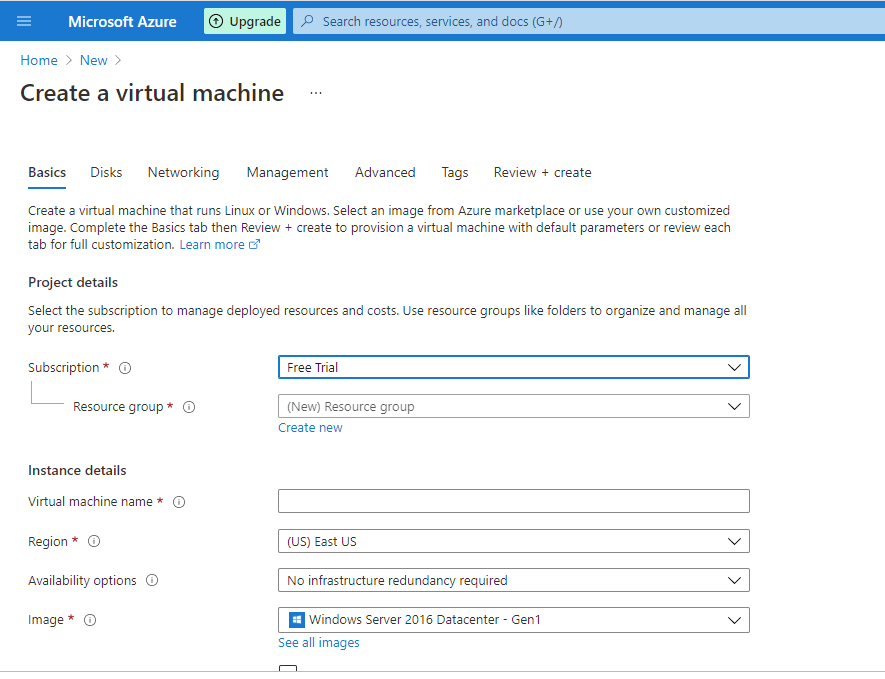
Chọn resource group, Virtual Machine name, Region.
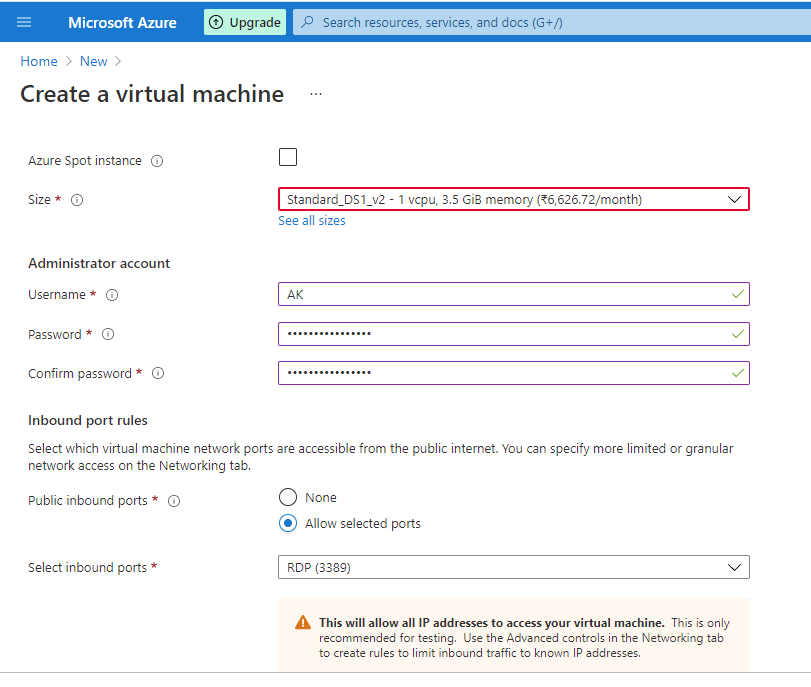
Chọn Instance type/Size, Input login Username and Password, chọn inbound port để kết nối Windows VM.
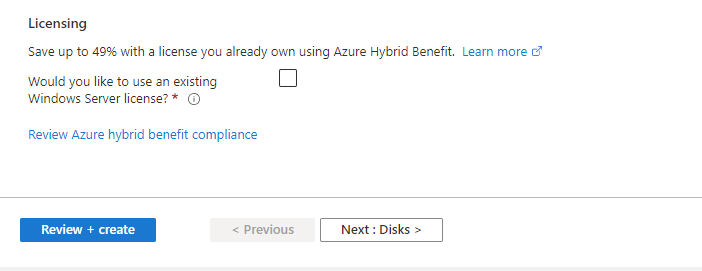
Chọn Licensing và click on Disks.
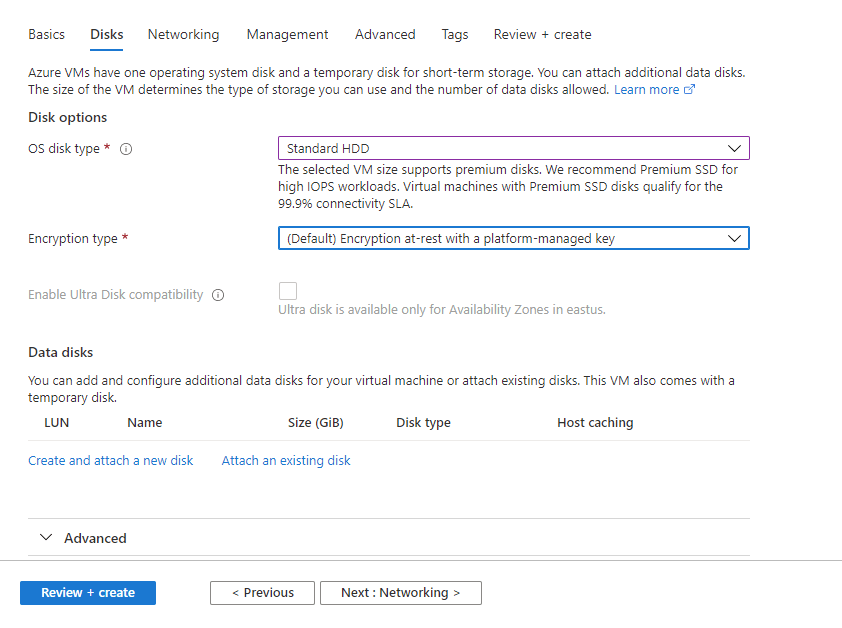
Step #2: Disks – Chọn OS disk type, Encryption type và click on Networking.
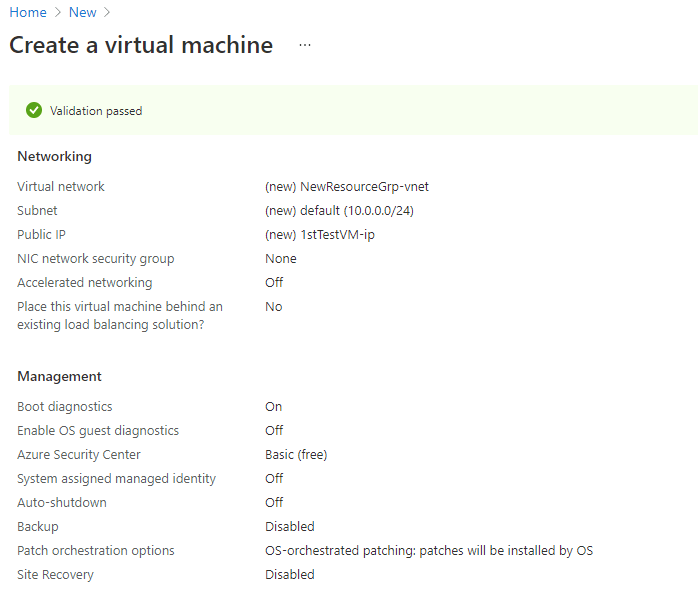
Step #3: Networking – chọn Virtual network, Subnet, Public IP, Nic Network Security Group
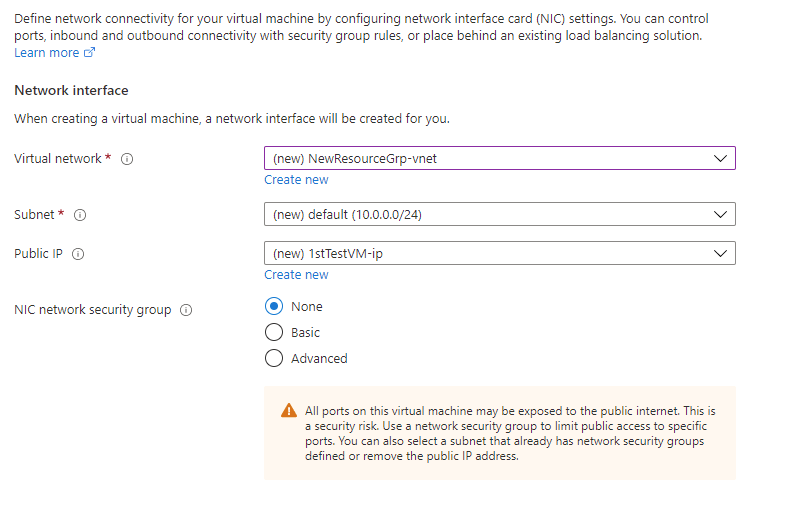
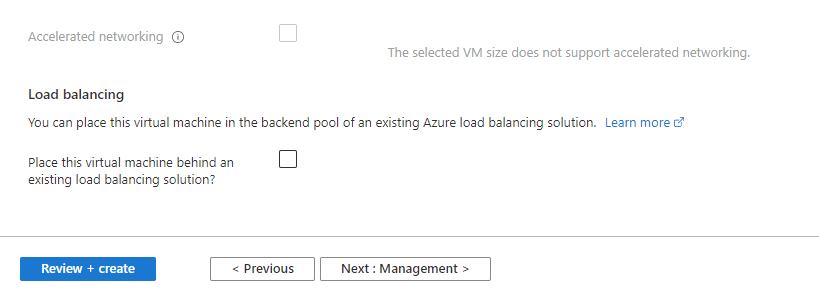
chọn Load Balancing nếu muốn và click on Management.
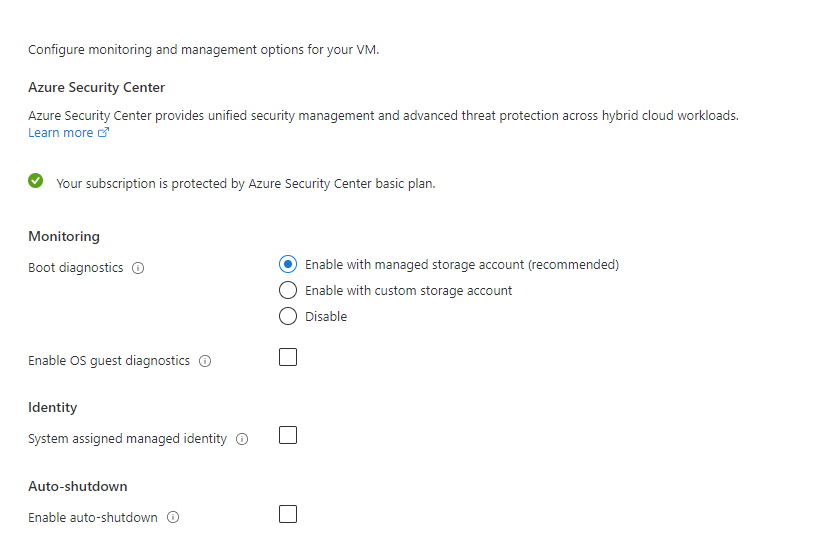
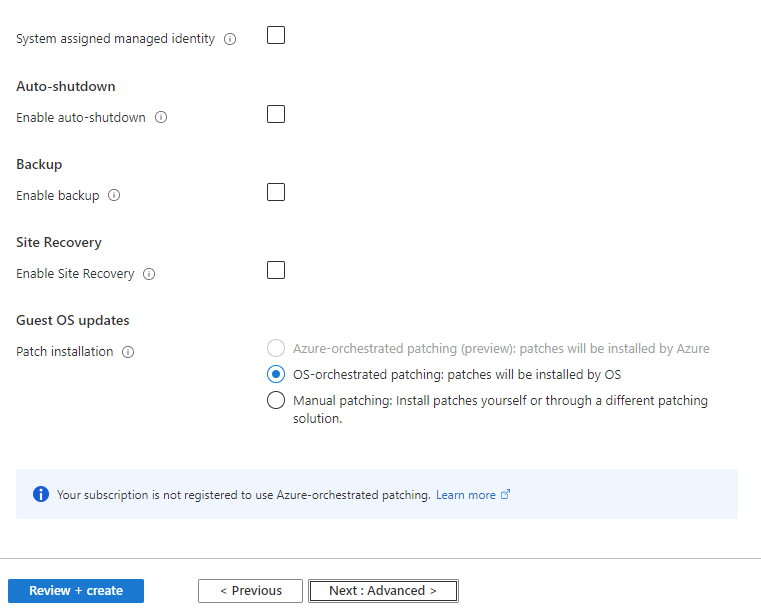
Step #4: Management– chọn Boot Diagnostics, patch installation option và click on Advanced.
Step #5: Advanced chọn Auto-shutdown, Backup và site recovery.
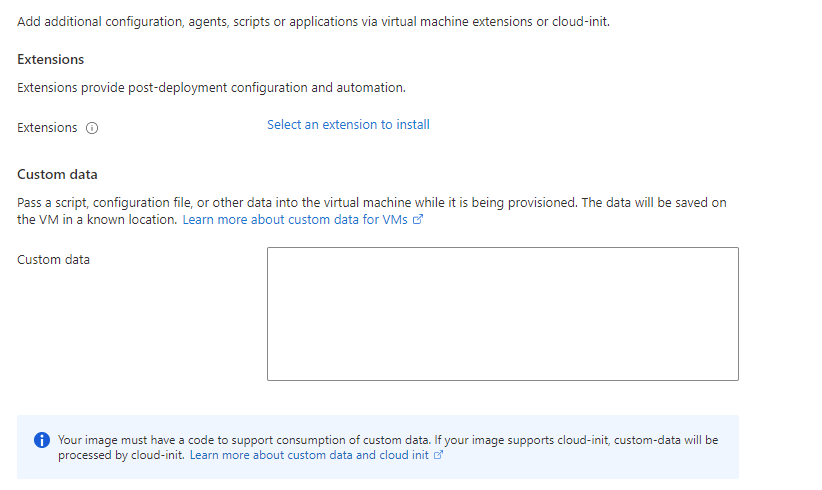
chọn extensions và custom data nếu muốn,
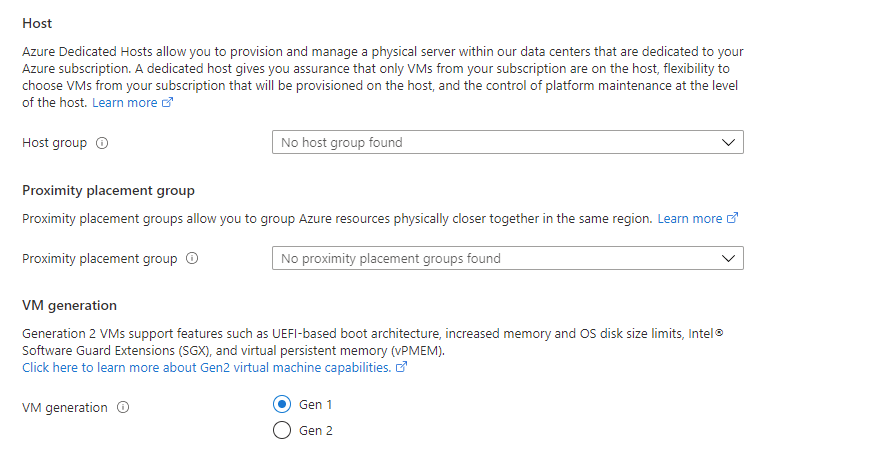
Chọn Host Group và VM Generation type, click on Tags.
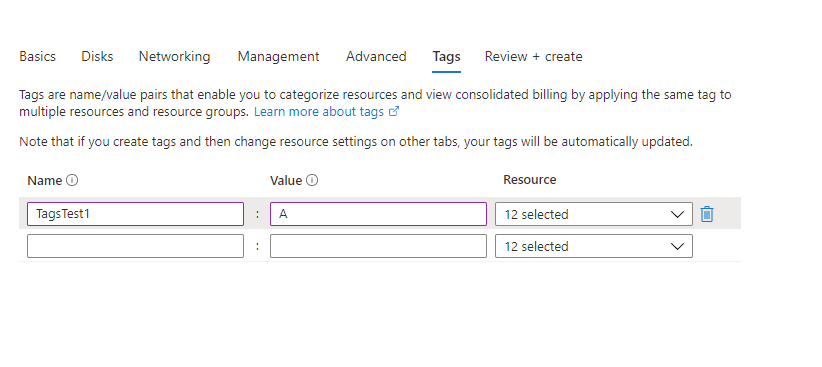
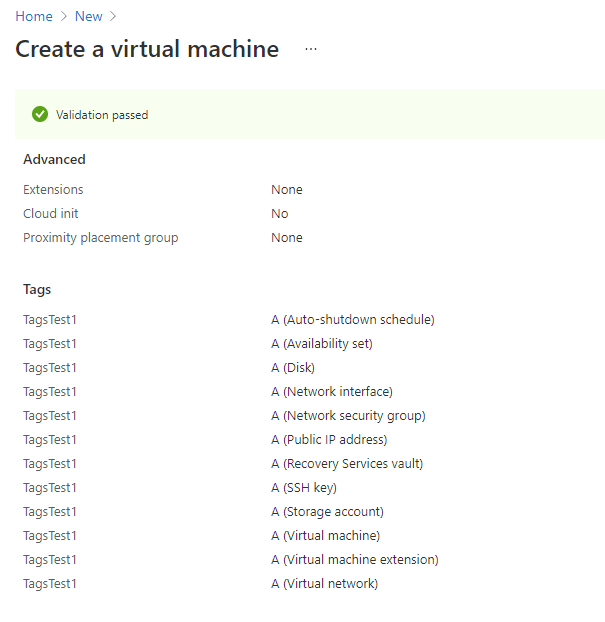
Step #6: Tags – Input VM tags.
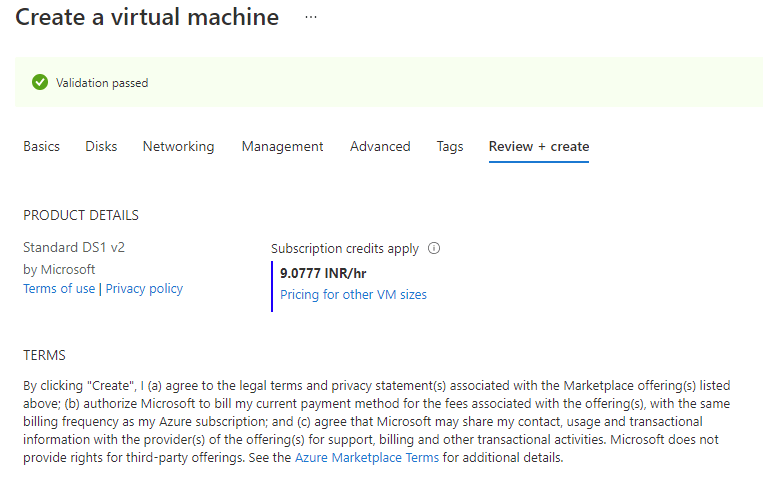
Step #7: Review+ create: Review the Azure VM
Review Azure VM Basics
Review networking và management.
Review Advanced và Tags
Đợi deploy Azure VM
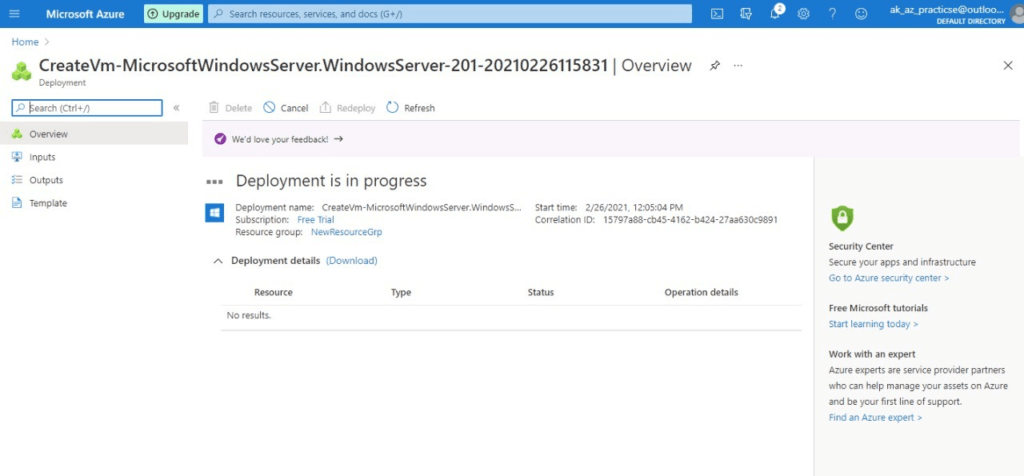
VM deployment xong
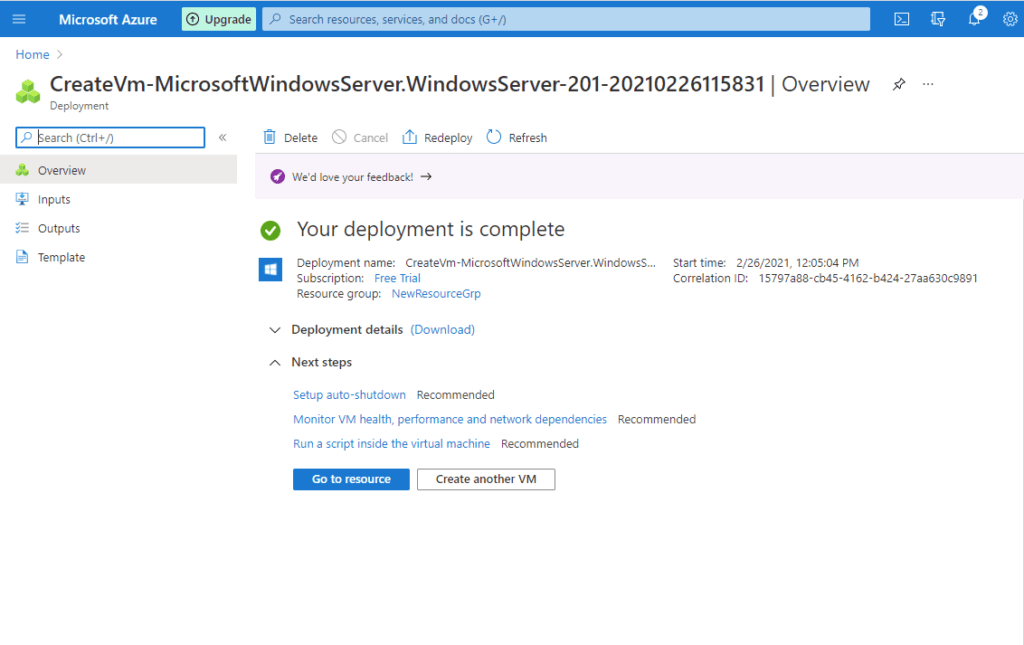
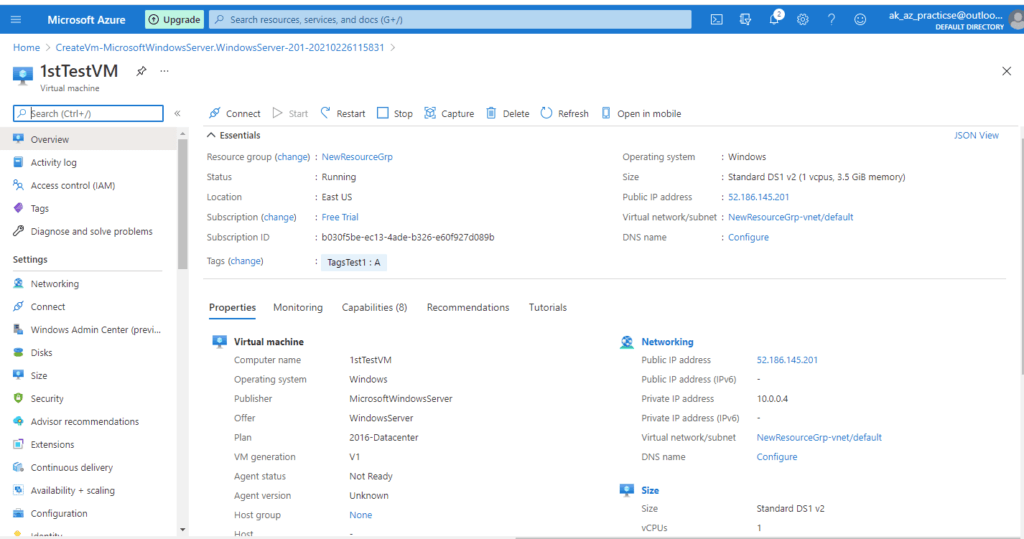
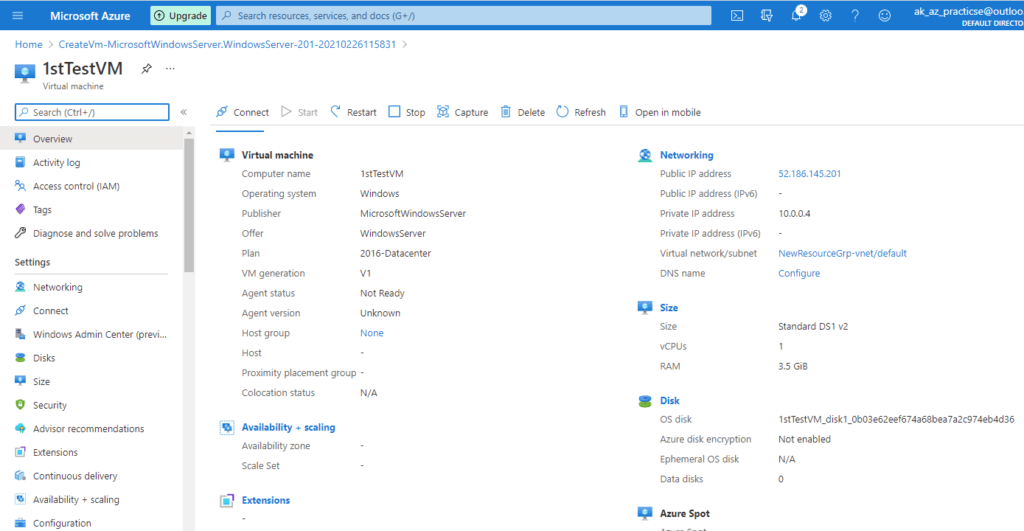
Quay lại Overview của Azure VM
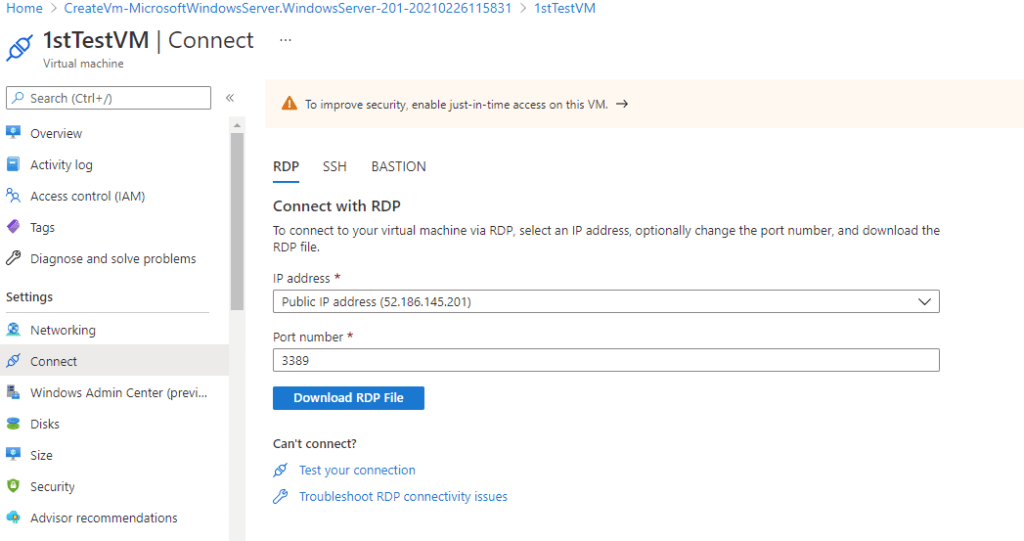
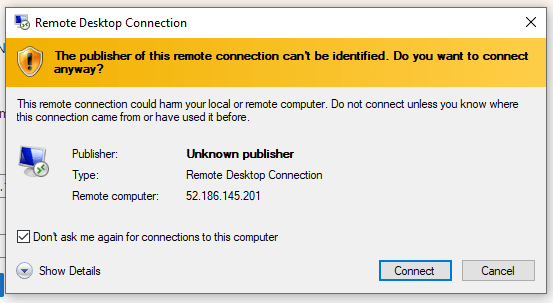
Step #8: Kết nối Windows Azure Virtual Machine dùng RDP, Click on connect
Lựa chọn Windows Azure Machine, select RDP, take IP và Port number, click on Download RDP file.
click on connect.
Nhập RDS username và password đã tạo lúc setup.
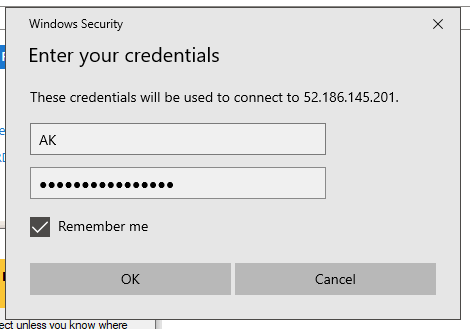
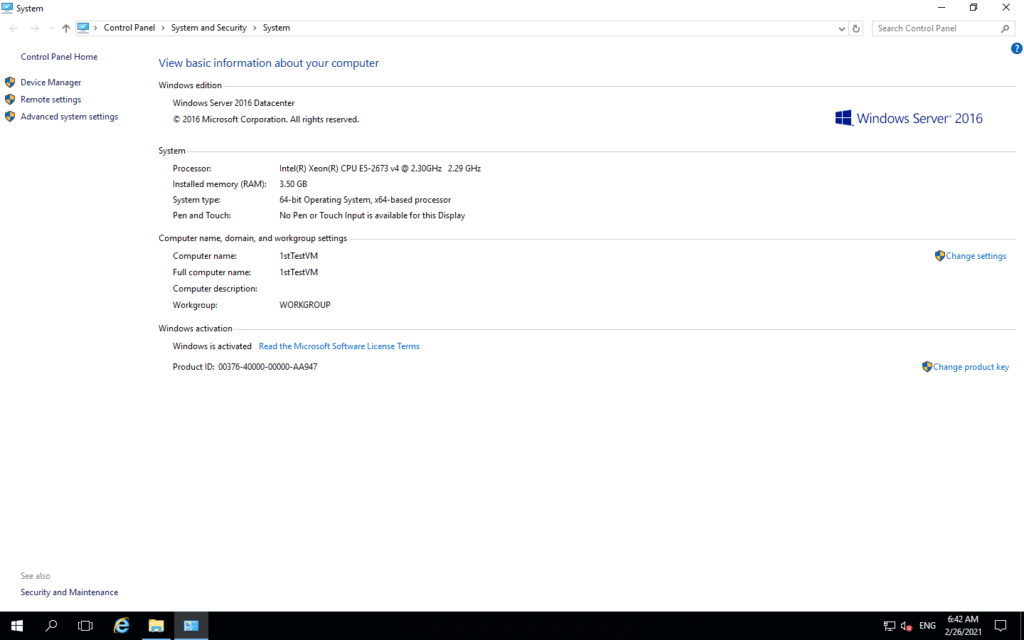
Login Azure Virtual Machine.
Lời kết
Như vậy qua bài viết này mình chia sẻ các bạn tạo một Virtual Machine Azure và kết đến Azure Windows Virtual Machine dùng RDP. Chúc các bạn thành công.!


